
Students will tell if a shape is 2-dimensional or 3-dimensional.
- Subject:
- Mathematics
- Material Type:
- Lesson Plan
- Provider:
- BetterLesson
- Date Added:
- 12/01/2022

Students will tell if a shape is 2-dimensional or 3-dimensional.
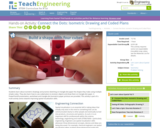
Students learn about isometric drawings and practice sketching on triangle-dot paper the shapes they make using multiple simple cubes. They also learn how to use coded plans to envision objects and draw them on triangle-dot paper. A PowerPoint® presentation, worksheet and triangle-dot (isometric) paper printout are provided. This activity is part of a multi-activity series towards improving spatial visualization skills.

Looks at how to find the volume and the surface area of a cylinder using the standard geometric formulas. [8:07]
Khan Academy learning modules include a Community space where users can ask questions and seek help from community members. Educators should consult with their Technology administrators to determine the use of Khan Academy learning modules in their classroom. Please review materials from external sites before sharing with students.

Students practice creating rudimentary detail drawings. They learn how engineers communicate the technical information about their designs using the basic components of detail drawings. They practice creating their own drawings of a three-dimensional block and a special LEGO piece, and then make 3D sketches of an unknown object using only the information provided in its detail drawing.

Interactive lesson which allows students to determine the perspective or point of view of a story character by imagining actually spending a day in their "shoes." Based on Atticus's statement in "To Kill a Mockingbird." W.11-12.3, 3a, 3b, 3c, 3d, 3e Narratives
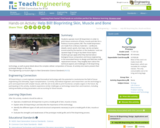
Students operate mock 3D bioprinters in order to print tissue constructs of bone, muscle and skin for a fictitious trauma patient, Bill. The model bioprinters are made from ordinary materials— cardboard, dowels, wood, spools, duct tape, zip ties and glue (constructed by the teacher or the students)—and use squeeze bags of icing to lay down tissue layers. Student groups apply what they learned about biological tissue composition and tissue engineering in the associated lesson to design and fabricate model replacement tissues. They tangibly learn about the technical aspects and challenges of 3D bioprinting technology, as well as great detail about the complex cellular composition of tissues. At activity end, teams present their prototype designs to the class.

This article is about the latest remake of Jules Verne's popular 144-year-old novel Journey to the Center of the Earth that also provides links to the American Geologic Institute's (AIG) Educator Guide for using the movie (Journey to the Center of the Earth 3D) to interest students in geology and earth science.
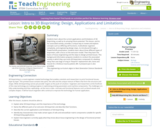
Students learn about the current applications and limitations of 3D bioprinting, as well as its amazing future potential. This lesson, and its fun associated activity, provides a unique way to review and explore concepts such as differing cell functions, multicellular organism complexity, and engineering design steps. As introduced through a PowerPoint® presentation, students learn about three different types of bioprinters, with a focus on the extrusion model. Then they learn the basics of tissue engineering and the steps to design printed tissues. This background information prepares students to conduct the associated activity in which they use mock-3D bioprinters composed of a desktop setup that uses bags of icing to “bioprint” replacement skin, bone and muscle for a fictitious trauma patient, Bill. A pre/post-quiz is also provided.

Learn about the nets that represent 3D solids. [6:48]
Khan Academy learning modules include a Community space where users can ask questions and seek help from community members. Educators should consult with their Technology administrators to determine the use of Khan Academy learning modules in their classroom. Please review materials from external sites before sharing with students.

Spatial visualization is the study of two- and three-dimensional objects and the practice of mental manipulation of objects. Spatial visualization skills are important in a range of subjects and activities like mathematics, physics, engineering, art and sports! In this lesson, students are introduced to the concept of spatial visualization and measure their spatial visualization skills by taking the provided 12-question quiz. Following the lesson, students complete the four associated spatial visualization activities and then re-take the quiz to see how much their spatial visualization skills have improved.

Students learn about one-axis rotations, and specifically how to rotate objects both physically and mentally to understand the concept. They practice drawing one-axis rotations through a group exercise using cube blocks to create shapes and then drawing those shapes from various x-, y- and z-axis rotation perspectives on triangle-dot paper (isometric paper). They learn the right-hand rule to explore rotations of objects. A worksheet is provided. This activity is part of a multi-activity series towards improving spatial visualization skills.

Excellent online lesson based on N. Scott Momaday's The Way to Rainy Mountain. Students create a three-voice narrative based on the novel in studying and learning about myths and folktales. W.9-10.3a,3b,3d,3e Narratives, W.9-10.5 Writing Process, W.11-12.3, 3a, 3b, 3c, 3d, 3e Narratives

Surface Area and Volume
Type of Unit: Conceptual
Prior Knowledge
Students should be able to:
Identify rectangles, parallelograms, trapezoids, and triangles and their bases and heights.
Identify cubes, rectangular prisms, and pyramids and their faces, edges, and vertices.
Understand that area of a 2-D figure is a measure of the figure's surface and that it is measured in square units.
Understand volume of a 3-D figure is a measure of the space the figure occupies and is measured in cubic units.
Lesson Flow
The unit begins with an exploratory lesson about the volumes of containers. Then in Lessons 2–5, students investigate areas of 2-D figures. To find the area of a parallelogram, students consider how it can be rearranged to form a rectangle. To find the area of a trapezoid, students think about how two copies of the trapezoid can be put together to form a parallelogram. To find the area of a triangle, students consider how two copies of the triangle can be put together to form a parallelogram. By sketching and analyzing several parallelograms, trapezoids, and triangles, students develop area formulas for these figures. Students then find areas of composite figures by decomposing them into familiar figures. In the last lesson on area, students estimate the area of an irregular figure by overlaying it with a grid. In Lesson 6, the focus shifts to 3-D figures. Students build rectangular prisms from unit cubes and develop a formula for finding the volume of any rectangular prism. In Lesson 7, students analyze and create nets for prisms. In Lesson 8, students compare a cube to a square pyramid with the same base and height as the cube. They consider the number of faces, edges, and vertices, as well as the surface area and volume. In Lesson 9, students use their knowledge of volume, area, and linear measurements to solve a packing problem.

Zooming In On Figures
Unit Overview
Type of Unit: Concept; Project
Length of Unit: 18 days and 5 days for project
Prior Knowledge
Students should be able to:
Find the area of triangles and special quadrilaterals.
Use nets composed of triangles and rectangles in order to find the surface area of solids.
Find the volume of right rectangular prisms.
Solve proportions.
Lesson Flow
After an initial exploratory lesson that gets students thinking in general about geometry and its application in real-world contexts, the unit is divided into two concept development sections: the first focuses on two-dimensional (2-D) figures and measures, and the second looks at three-dimensional (3-D) figures and measures.
The first set of conceptual lessons looks at 2-D figures and area and length calculations. Students explore finding the area of polygons by deconstructing them into known figures. This exploration will lead to looking at regular polygons and deriving a general formula. The general formula for polygons leads to the formula for the area of a circle. Students will also investigate the ratio of circumference to diameter ( pi ). All of this will be applied toward looking at scale and the way that length and area are affected. All the lessons noted above will feature examples of real-world contexts.
The second set of conceptual development lessons focuses on 3-D figures and surface area and volume calculations. Students will revisit nets to arrive at a general formula for finding the surface area of any right prism. Students will extend their knowledge of area of polygons to surface area calculations as well as a general formula for the volume of any right prism. Students will explore the 3-D surface that results from a plane slicing through a rectangular prism or pyramid. Students will also explore 3-D figures composed of cubes, finding the surface area and volume by looking at 3-D views.
The unit ends with a unit examination and project presentations.

Students will continue to explore surface area, looking at more complex solids made up of cubes. Students will look at the 2-D views of these solids to see all of the surfaces and to find a shorter method to calculate the surface area.Key ConceptsThe 2-D views of 3-D figures (front top and side) show all of the surfaces of the figure (the area of the three views is doubled or the back, bottom, and other side) and so can be used to calculate surface area. The only exception is when surfaces are hidden or blocked and must be accounted for.GoalsExplore the relationship between 2-D views of figures and their surface area.Find the surface area of different solids.
Students learn about two-axis rotations, and specifically how to rotate objects both physically and mentally about two axes. A two-axis rotation is a rotation of an object about a combination of x, y or z-axes, as opposed to a single-axis rotation, which is about a single x, y or z-axis. Students practice drawing two-axis rotations through an exercise using simple cube blocks to create shapes, and then drawing on triangle-dot paper the shapes from various x-, y- and z-axis rotation perspectives. They use the right-hand rule to explore the rotations of objects. A worksheet is provided. This activity is part of a multi-activity series towards improving spatial visualization skills. At activity end, students re-take the 12-question quiz they took in the associated lesson (before conducting four associated activities) to measure how their spatial visualizations skills improved.

Learn about the relationships between two- and three-dimensional objects with the Odd Squad. A new villain is on the loose, and he's flattening things around town. Olive and Otto are on the case!

Student groups use a "real" 3D coordinate system to plot points in space. Made from balsa wood or wooden dowels, the system has three axes at right angles and a plane (the XY plane) that can slide up and down the Z axis. Students are given several coordinates and asked to find these points in space. Then they find the coordinates of the eight corners of a box/cube with given dimensions.
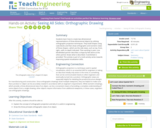
Students learn how to create two-dimensional representations of three-dimensional objects by utilizing orthographic projection techniques. They build shapes using cube blocks and then draw orthographic and isometric views of those shapes—which are the side views, such as top, front, right—with no depth indicated. Then working in pairs, one blindfolded partner describes a shape by feel alone as the other partner draws what is described. A worksheet is provided. This activity is part of a multi-activity series towards improving spatial visualization skills.