
Students explore the faces, bases, edges, and vertices of prisms and pyramids to help develop the concepts of volume and surface area.
- Subject:
- Mathematics
- Material Type:
- Lesson Plan
- Provider:
- BetterLesson
- Date Added:
- 12/01/2022

Students explore the faces, bases, edges, and vertices of prisms and pyramids to help develop the concepts of volume and surface area.
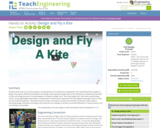
Students learn how to use wind energy to combat gravity and create lift by creating their own tetrahedral kites capable of flying. They explore different tetrahedron kite designs, learning that the geometry of the tetrahedron shape lends itself well to kites and wings because of its advantageous strength-to-weight ratio. Then they design their own kites using drinking straws, string, lightweight paper/plastic and glue/tape. Student teams experience the full engineering design cycle as if they are aeronautical engineers—they determine the project constraints, research the problem, brainstorm ideas, select a promising design and build a prototype; then they test and redesign to achieve a successful flying kite. Pre/post quizzes and a worksheet are provided.

Read a concise history of Egypt, covering the times of pre-pharonic Egypt up to current times. Find out about the pharaohs, Turkish occupation, British control, and Egypt today. Includes brief information on the Muslim Brotherhood in Egypt. Information is from the U.S. State Dept. Background Notes.
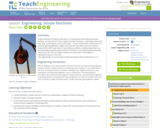
Simple machines are devices with few or no moving parts that make work easier. Students are introduced to the six types of simple machines the wedge, wheel and axle, lever, inclined plane, screw, and pulley in the context of the construction of a pyramid, gaining high-level insights into tools that have been used since ancient times and are still in use today. In two hands-on activities, students begin their own pyramid design by performing materials calculations, and evaluating and selecting a construction site. The six simple machines are examined in more depth in subsequent lessons in this unit.
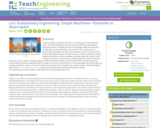
Simple machines are devices with few or no moving parts that make work easier, and which people have used to provide mechanical advantage for thousands of years. Students learn about the wedge, wheel and axle, lever, inclined plane, screw and pulley in the context of the construction of a pyramid, gaining insights into tools that have been used since ancient times and are still important today. Through numerous hands-on activities, students imagine themselves as ancient engineers building a pyramid. Student teams evaluate and select a construction site, design a pyramid, perform materials calculations, test a variety of cutting wedges on different materials, design a small-scale cart/lever transport system to convey building materials, experiment with the angle of inclination and pull force on an inclined plane, see how a pulley can change the direction of force, and learn the differences between fixed, movable and combined pulleys. While learning the steps of the engineering design process, students practice teamwork, creativity and problem solving.
Students explore measurements of geometric figures in two-and three-dimensions, finding area, surface area, and volume in mathematical and real-world problems.
Students explore methods employing simple machines likely used in ancient pyramid building, as well as common modern-day material transportation. They learn about the wheel and axle as a means to transport materials from rock quarry to construction site. They also learn about different types and uses of a lever for purposes of transport. In an open-ended design activity, students choose from everyday materials to engineer a small-scale cart and lever system to convey pyramid-building materials.

Differentiate between different levels of scientific evidence using this infographic. Discover eight distinct levels of scientific evidence arranged in a pyramid that reflects a spectrum of quality. This resource was developed in partnership with Dr. Katrine Wallace, an epidemiologist, educator and science literacy influencer.

Awesome examples of Egyptian art are given on these web pages from The Metropolitan Museum of Art in New York. Enjoy looking at pictures of actual pieces of art that are currently in the museum. Along with the art are brief historical biographies about each piece.

Chronological history with photographs from cultural periods at the Teotihuacan site. Note that site can be viewed in Spanish.


Surface Area and Volume
Type of Unit: Conceptual
Prior Knowledge
Students should be able to:
Identify rectangles, parallelograms, trapezoids, and triangles and their bases and heights.
Identify cubes, rectangular prisms, and pyramids and their faces, edges, and vertices.
Understand that area of a 2-D figure is a measure of the figure's surface and that it is measured in square units.
Understand volume of a 3-D figure is a measure of the space the figure occupies and is measured in cubic units.
Lesson Flow
The unit begins with an exploratory lesson about the volumes of containers. Then in Lessons 2–5, students investigate areas of 2-D figures. To find the area of a parallelogram, students consider how it can be rearranged to form a rectangle. To find the area of a trapezoid, students think about how two copies of the trapezoid can be put together to form a parallelogram. To find the area of a triangle, students consider how two copies of the triangle can be put together to form a parallelogram. By sketching and analyzing several parallelograms, trapezoids, and triangles, students develop area formulas for these figures. Students then find areas of composite figures by decomposing them into familiar figures. In the last lesson on area, students estimate the area of an irregular figure by overlaying it with a grid. In Lesson 6, the focus shifts to 3-D figures. Students build rectangular prisms from unit cubes and develop a formula for finding the volume of any rectangular prism. In Lesson 7, students analyze and create nets for prisms. In Lesson 8, students compare a cube to a square pyramid with the same base and height as the cube. They consider the number of faces, edges, and vertices, as well as the surface area and volume. In Lesson 9, students use their knowledge of volume, area, and linear measurements to solve a packing problem.
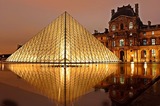
Lesson OverviewStudents use scissors to transform a net for a unit cube into a net for a square pyramid. They then investigate how changing a figure from a cube to a square pyramid affects the number of faces, edges, and vertices and how it changes the surface area and volume.Key ConceptsA square pyramid is a 3-D figure with a square base and four triangular faces.In this lesson, the net for a cube is transformed into a net for a square pyramid. This requires cutting off one square completely and changing four others into isosceles triangles.It is easy to see that the surface area of the pyramid is less than the surface area of the cube, because part of the cube's surface is cut off to create the pyramid. Specifically, the surface area of the pyramid is 3 square units, and the surface area of the cube is 6 square units. Students will be able to see visually that the volume of the pyramid is less than that of the cube.Students consider the number of faces, vertices, and edges of the two figures. A face is a flat side of a figure. An edge is a segment where 2 faces meet. A vertex is the point where three or more faces meet. A cube has 6 faces, 8 vertices, and 12 edges. A square pyramid has 5 faces, 5 vertices, and 8 edges.Goals and Learning ObjectivesChange the net of a cube into the net of a pyramid.Find the surface area of the pyramid.

A complete reference guide to solid geometry. The mathematics resource provides definitions and interactive activities that enhance further explanation.
Students investigate the ways in which ancient technologies six types of simple machines and combinations are used to construct modern buildings. As they work together to solve a design problem (designing and building a modern structure), they brainstorm ideas, decide on a design, and submit it to a design review before acquiring materials to create it (in this case, a mural depicting it). Emphasis is placed on cooperative, creative teamwork and the steps of the engineering design process.

A conceptual understanding of finding surface area using nets instead of a formula.
Students continue to explore the story of building a pyramid, learning about the simple machine called a pulley. They learn how a pulley can be used to change the direction of applied forces and move/lift extremely heavy objects, and the powerful mechanical advantages of using a multiple-pulley system. Students perform a simple demonstration to see the mechanical advantage of using a pulley, and they identify modern day engineering applications of pulleys. In a hands-on activity, they see how a pulley can change the direction of a force, the difference between fixed and movable pulleys, and the mechanical advantage gained with multiple / combined pulleys. They also learn the many ways engineers use pulleys for everyday purposes.
Students apply the mechanical advantages and problem-solving capabilities of six types of simple machines (wedge, wheel and axle, lever, inclined plane, screw, pulley) as they discuss modern structures in the spirit of the engineers and builders of the great pyramids. While learning the steps of the engineering design process, students practice teamwork, creativity and problem solving.

Demonstrates what types of shapes one can get in a cross-section when a rectangular pyramid is sliced. [3:29]
Khan Academy learning modules include a Community space where users can ask questions and seek help from community members. Educators should consult with their Technology administrators to determine the use of Khan Academy learning modules in their classroom. Please review materials from external sites before sharing with students.
Students explore building a pyramid, learning about the simple machine called an inclined plane. They also learn about another simple machine, the screw, and how it is used as a lifting or fastening device. During a hands-on activity, students see how the angle of inclination and pull force can make it easier (or harder) to pull an object up an inclined plane.